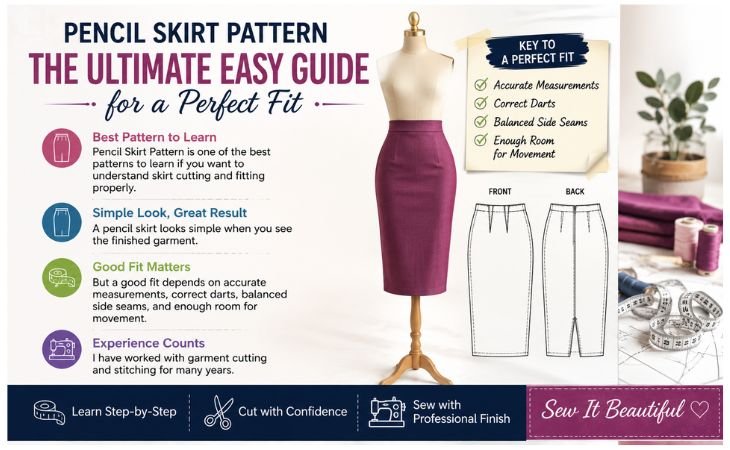
Pencil Skirt Pattern is one of the best patterns to learn if you want to understand skirt cutting and fitting properly.
A pencil skirt looks simple when you see the finished garment.
But a good fit depends on accurate measurements, correct darts, balanced side seams, and enough room for movement.
I have worked with garment cutting and stitching for many years.
One thing I have learned is that a simple design often needs more attention than a complicated one.
A small fitting mistake is easy to see on a pencil skirt because the garment follows the natural shape of the body.
In this guide, I will explain how a pencil skirt pattern works, which measurements you need, how the pattern is shaped, and what you should check before cutting your final fabric.
What Is a Pencil Skirt Pattern?
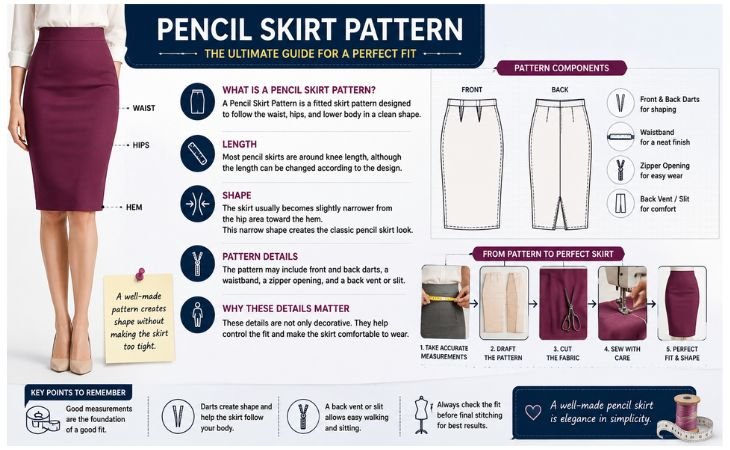
A Pencil Skirt Pattern is a fitted skirt pattern designed to follow the waist, hips, and lower body in a clean shape.
Most pencil skirts are around knee length, although the length can be changed according to the design.
The skirt usually becomes slightly narrower from the hip area toward the hem.
This narrow shape creates the classic pencil skirt look.
The pattern may include front and back darts, a waistband, a zipper opening, and a back vent or slit.
These details are not only decorative. They help control the fit and make the skirt comfortable to wear.
A well-made pattern should create shape without making the skirt too tight.
Why Accurate Measurements Are Important
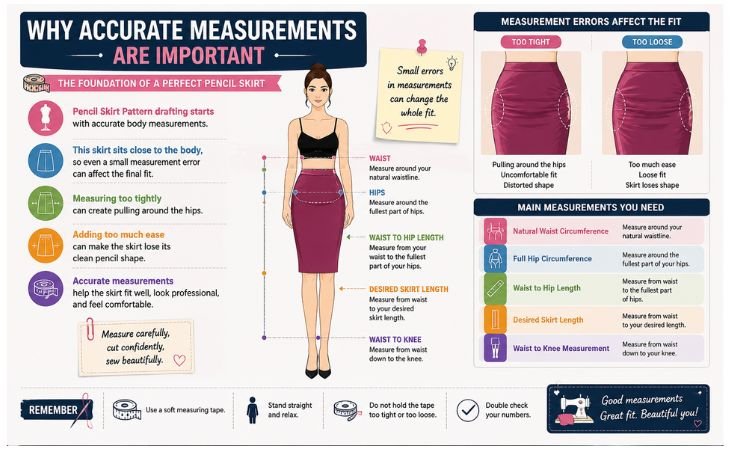
Pencil Skirt Pattern drafting starts with accurate body measurements.
Because this skirt sits close to the body, even a small measurement error can affect the final fit.
Measuring too tightly can create pulling around the hips. Adding too much ease can make the skirt lose its clean pencil shape.
The main measurements you normally need are:
- Natural waist circumference
- Full hip circumference
- Waist to hip length
- Desired skirt length
- Waist to knee measurement
- Comfortable wearing ease
Always measure the body while standing naturally.
Keep the measuring tape comfortably around your body without making it too tight.
The tape should sit comfortably around the body without hanging loose.
Good measurement is the foundation of good pattern cutting.
Understanding Ease in a Pencil Skirt
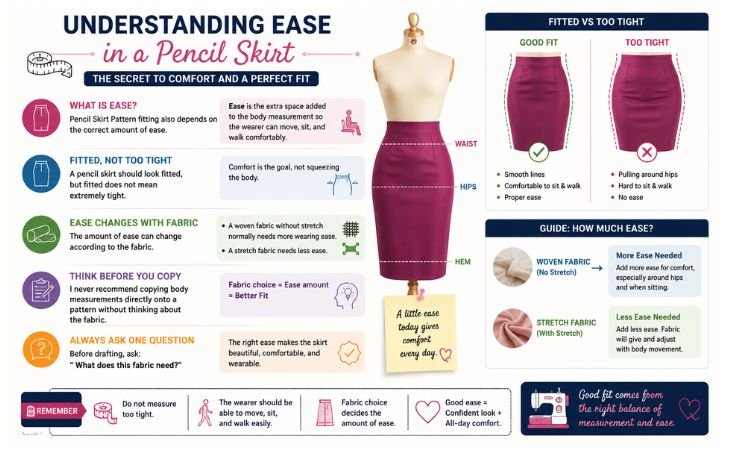
Pencil Skirt Pattern fitting also depends on the correct amount of ease.
Ease is the extra space added to the body measurement so the wearer can move, sit, and walk comfortably.
A pencil skirt should look fitted, but fitted does not mean extremely tight.
The amount of ease can change according to the fabric. A woven fabric without stretch normally needs more wearing ease than a stretch fabric.
This is why I never recommend copying body measurements directly onto a pattern without thinking about the fabric.
Always ask one question before drafting.
How will this fabric behave when the person walks or sits?
That simple question can prevent many fitting problems.
How Darts Shape a Pencil Skirt
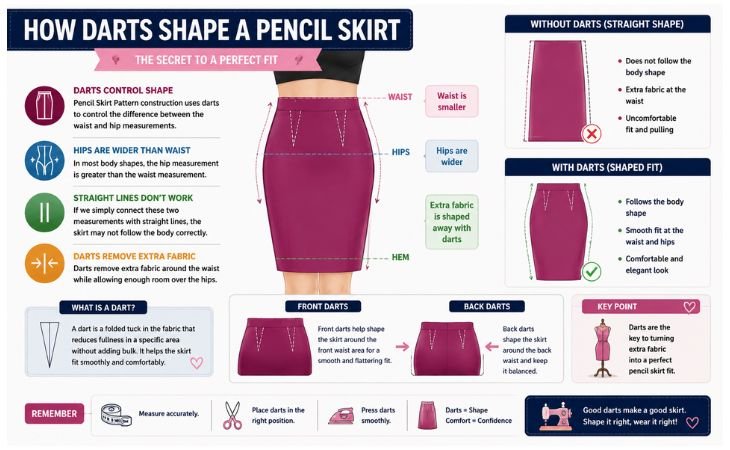
Pencil Skirt Pattern construction uses darts to control the difference between the waist and hip measurements.
In most body shapes, the hip measurement is greater than the waist measurement.
If we simply connect these two measurements with straight lines, the skirt may not follow the body correctly.
Darts remove extra fabric around the waist while allowing enough room over the hips.
Front Darts
Front darts help shape the skirt around the front waist area.
They should point toward the fullest area without extending too far.
A dart that is too long or too deep can create an unwanted point or crease.
Back Darts
Back darts usually provide more shaping because the back of the body often requires greater contouring.
Their exact position and depth should depend on the wearer’s measurements and body shape.
This is where pattern cutting becomes more than mathematics. You must also understand the shape of the body.
Creating the Side Seam and Pencil Shape
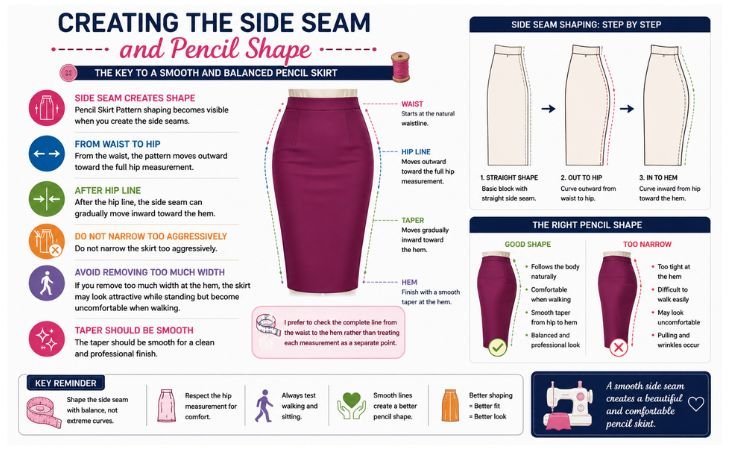
Pencil Skirt Pattern shaping becomes visible when you create the side seams.
From the waist, the pattern moves outward toward the full hip measurement.
After the hip line, the side seam can gradually move inward toward the hem.
Do not narrow the skirt too aggressively.
If you remove too much width at the hem, the skirt may look attractive while standing but become uncomfortable when walking.
The taper should be smooth.
I prefer to check the complete line from the waist to the hem rather than treating each measurement as a separate point.
A good side seam should look balanced before the fabric is even cut.
Why a Back Vent or Slit Matters
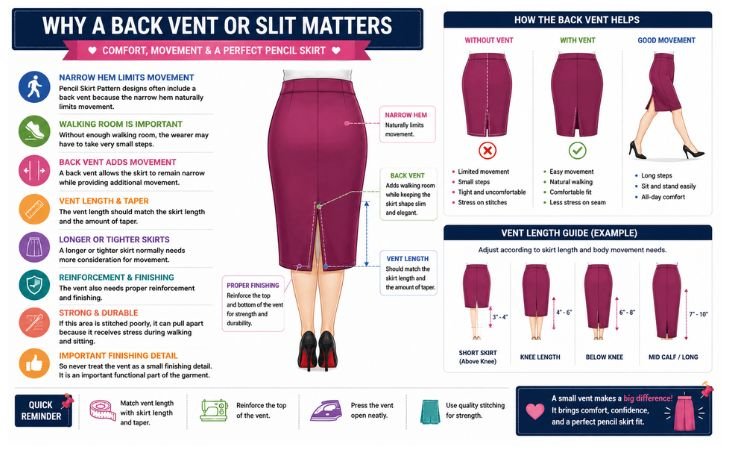
Pencil Skirt Pattern designs often include a back vent because the narrow hem naturally limits movement.
Without enough walking room, the wearer may have to take very small steps.
A back vent allows the skirt to remain narrow while providing additional movement.
The vent length should match the skirt length and the amount of taper.
A longer or tighter skirt normally needs more consideration for movement.
The vent also needs proper reinforcement and finishing.
If this area is stitched poorly, it can pull apart because it receives stress during walking and sitting.
So never treat the vent as a small finishing detail. It is an important functional part of the garment.
Choosing the Right Fabric
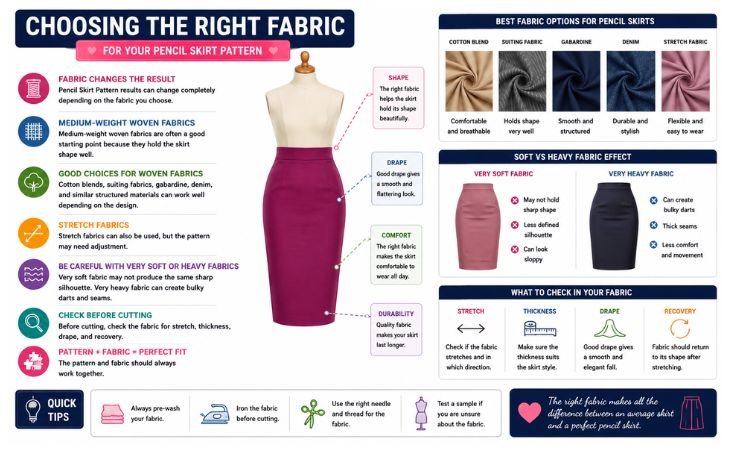
Pencil Skirt Pattern results can change completely depending on the fabric you choose.
Medium-weight woven fabrics are often a good starting point because they hold the skirt shape well.
Cotton blends, suiting fabrics, gabardine, denim, and similar structured materials can work well depending on the design.
Stretch fabrics can also be used, but the pattern may need adjustment.
Very soft fabric may not produce the same sharp silhouette. Very heavy fabric can create bulky darts and seams.
Before cutting, check the fabric for stretch, thickness, drape, and recovery.
The pattern and fabric should always work together.
Cutting and Sewing the Pencil Skirt
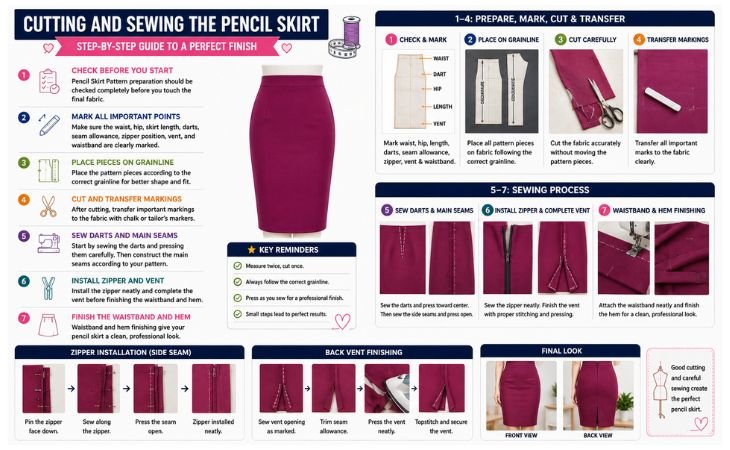
Pencil Skirt Pattern preparation should be checked completely before you touch the final fabric.
Make sure the waist, hip, skirt length, darts, seam allowance, zipper position, vent, and waistband are clearly marked.
Place the pattern pieces according to the correct grainline.
After cutting, transfer important markings to the fabric.
Start by sewing the darts and pressing them carefully. Then construct the main seams according to your pattern.
Install the zipper neatly and complete the vent before finishing the waistband and hem.
Pressing is also part of sewing.
Press each important construction stage instead of waiting until the whole skirt is finished.
Good pressing can make a simple skirt look much more professional.
Common Pencil Skirt Fitting Problems
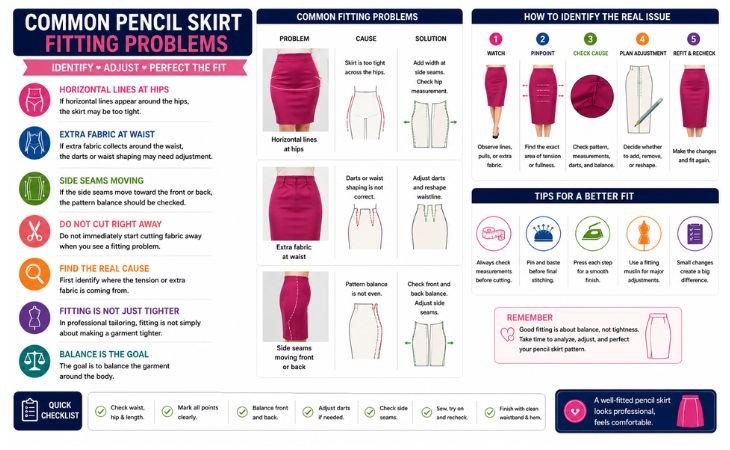
Pencil Skirt Pattern mistakes often become visible during the first fitting.
If horizontal lines appear around the hips, the skirt may be too tight.
If extra fabric collects around the waist, the darts or waist shaping may need adjustment.
If the side seams move toward the front or back, the pattern balance should be checked.
Do not immediately start cutting fabric away when you see a fitting problem.
First identify where the tension or extra fabric is coming from.
In professional tailoring, fitting is not simply about making a garment tighter.
The goal is to balance the garment around the body.
Make a Test Skirt Before Using Expensive Fabric
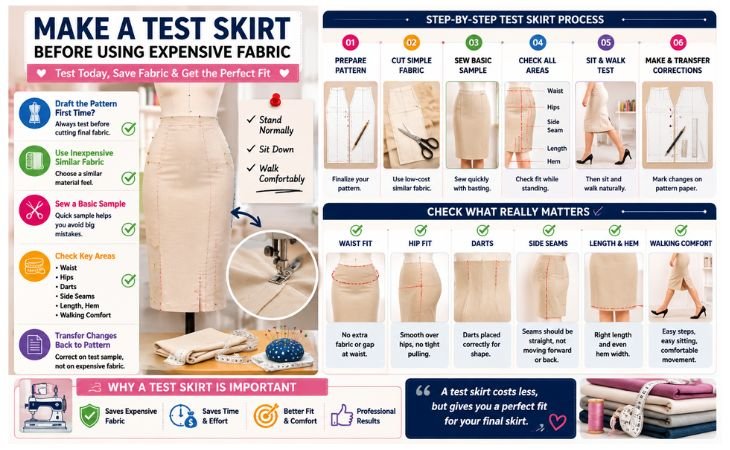
Pencil Skirt Pattern testing is especially useful when you are drafting the pattern for the first time.
Use inexpensive fabric with similar properties to your final material.
Sew a basic sample and check the waist, hips, darts, side seams, length, hem width, and walking comfort.
Stand naturally while checking the fit.
Then sit down and walk.
A skirt that looks perfect while standing can still be uncomfortable during normal movement.
Make your corrections on the test garment and transfer those changes back to the paper pattern.
Once the pattern fits correctly, you have a much stronger base for future pencil skirts.
Final Thoughts
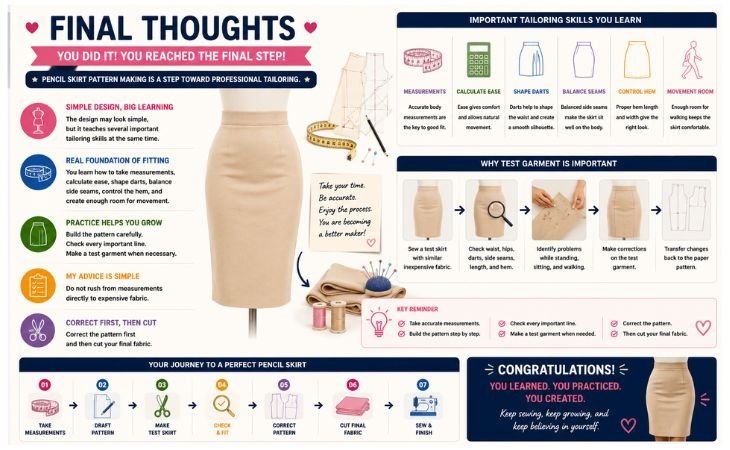
Pencil Skirt Pattern making is an excellent way to learn the real foundation of garment fitting.
The design may look simple, but it teaches several important tailoring skills at the same time.
You learn how to take measurements, calculate ease, shape darts, balance side seams, control the hem, and create enough room for movement.
My advice is simple.
Do not rush from measurements directly to expensive fabric.
Build the pattern carefully. Check every important line. Make a test garment when necessary.
Correct the pattern first and then cut your final fabric.
A professional pencil skirt is not created by complicated sewing.
It is created by accurate measurements, a balanced pattern, careful fitting, and clean stitching.
Once you understand these principles, you can use the same knowledge to create many different fitted skirt designs with much more confidence.
Want to explore more skirt styles? Visit our Skirt Patterns and Stitching page to find more patterns and sewing guides.
Want to improve your sewing skills? Explore trusted sewing resources for more professional techniques and practical guidance.