

Make dress pattern at home like a pro, this simple skill is becoming one of the biggest creative trends of 2025.
More and more people are moving away from store-bought patterns and choosing to design their own custom outfits from scratch.
And the best part? You don’t need expensive tools or a fancy studio. You only need the right steps.
At My Tailor Studio, we create real custom dress patterns every week, and today I’m sharing that same practical expertise with you, so you can achieve perfect fitting,
clean structure, and professional-level accuracy right at home.
Whether you’re a complete beginner or an experienced tailor refining your skills, learning how to make dress pattern at home gives you:
full design freedom
a personalized, perfect fit
better control over your style
and the confidence of wearing something crafted just for you
In this complete guide, you’ll learn the tools you need, how to take accurate measurements, how to draft each part of the dress pattern,
and how to turn your idea into a beautifully wearable garment, because this time, you made it yourself. ![]()
Why Making Dress Patterns at Home Matters

Make dress pattern at home, many beginners wonder if it’s really possible without advanced skills.
The truth is: yes, it absolutely is, and this section explains why.
In today’s digital fashion age, creating your own dress patterns isn’t just about saving money; it’s about unlocking your creativity, improving your skills, and gaining complete control over your wardrobe.
Whether you’re a hobbyist or someone planning to start a small fashion business, learning how to draft patterns at home saves time,
reduces tailoring errors, and gives you the confidence of wearing perfectly–fitted, self-made designs.
With modern tools, clear guides, and simple techniques, even beginners can design clean, accurate patterns without any complicated software.
All you need is a few smart tools, some paper, and a little inspiration to start creating professional-quality patterns right from home.
Essential Tools for Making Dress Patterns at Home
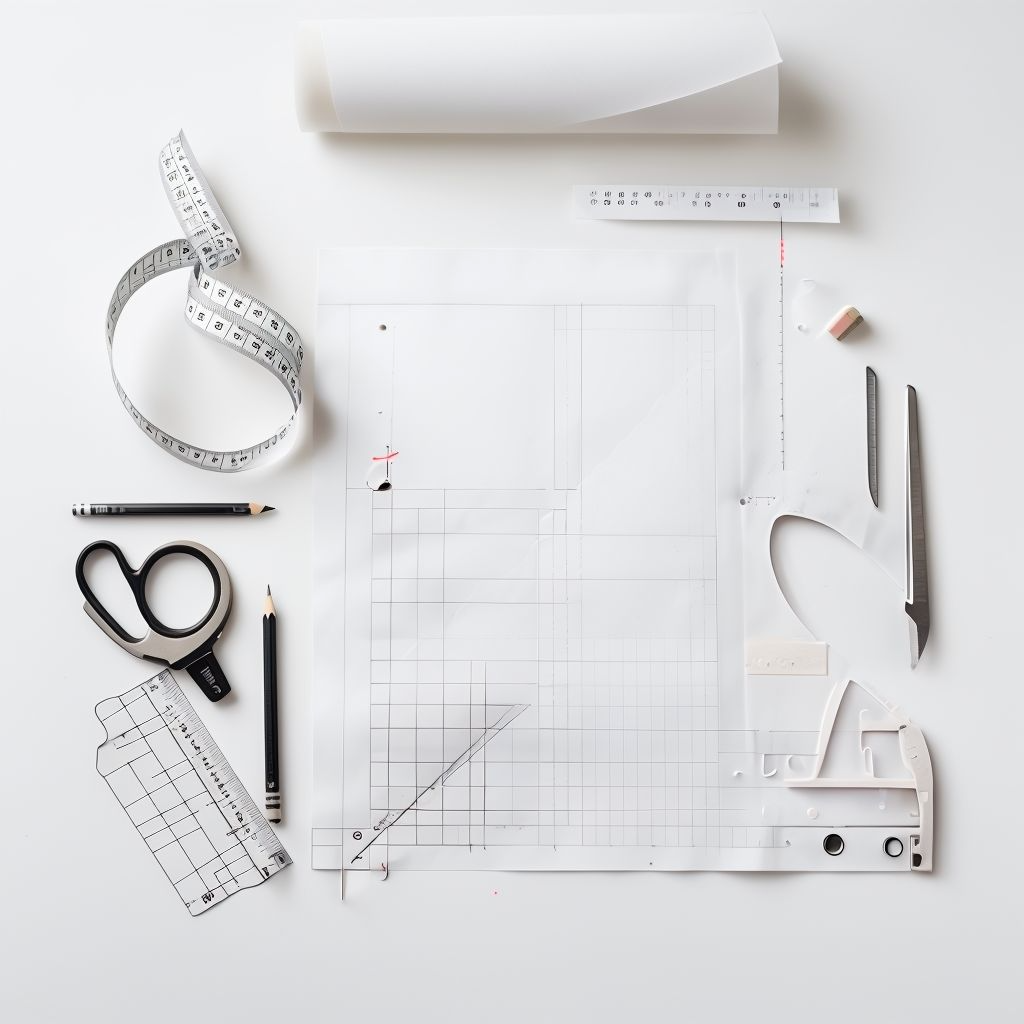
Make dress pattern at home successfully, and you’ll quickly realize that you don’t need a professional studio, just the right tools.
With a few essential items, anyone can draft clean, accurate, and stylish dress patterns from their own workspace.
Here are the core tools every beginner and home tailor should keep in their kit:
Measuring Tape: For taking precise body measurements that ensure a perfect fit.
Pattern Paper or Kraft Paper: Your blank canvas for sketching and drafting dress shapes.
French Curve or Hip Curve: Ideal for creating smooth armholes, necklines, and flowing lines.
Tailor’s Ruler & Set Square: Helps you maintain accuracy in angles, edges, and grainlines.
Pencils, Erasers, and Sharp Scissors: Essential for marking, correcting, and cutting clean patterns.
Pattern Notcher & Tracing Wheel: Great for adding professional finishing touches and transferring markings.
These basic tools make the process simple, organized, and efficient.
With them, anyone can confidently begin creating beautiful patterns right at home, whether you’re designing casual dresses or planning your first custom project.
How to Take Accurate Body Measurements at Home
make dress pattern at home with professional accuracy, the most important foundation is precise body measurements.
A perfectly fitted dress is always the result of careful measuring, not guessing.
Whether you’re creating a custom design or following a standard pattern, correct measurements ensure comfort, balance, and a clean silhouette.
When measuring at home, keep your posture relaxed, use a soft measuring tape, and measure close to the body without tightening the tape.
These simple habits prevent errors and guarantee that your dress pattern matches your natural shape beautifully.
1. Bust Measurement
Measure around the fullest part of your chest, keeping the tape straight across your back.
![]() Don’t tighten the tape — let it sit naturally.
Don’t tighten the tape — let it sit naturally.
2. Under-Bust Measurement
Place the tape directly under the bust.
This helps create perfect shaping for structured dresses and fitted bodices.
3. Waist Measurement
Find your natural waistline (right above the navel).
Stand straight and breathe normally, tightening the stomach will give wrong results.
4. High Hip Measurement
Measure around the top of your hip bones.
Useful for patterns that require shaping around the upper body curve.
5. Full Hip Measurement
Wrap the tape around the fullest part of the hips and buttocks.
This ensures your dress pattern doesn’t pull or feel tight when walking.
6. Shoulder Width
Measure from the end of one shoulder bone to the other.
This is key for blazer dresses, tops, and structured sleeves.
7. Front Length (Shoulder to Waist)
Start from the shoulder tip → down to the natural waist.
Helps in creating accurate bodice patterns.
8. Back Length (Nape to Waist)
Measure from the back neckline to the waist.
Needed for perfect balancing of front/back lengths.
9. Armhole / Arm Round
Circle the tape loosely around the shoulder joint.
Avoid tight measurements, arm movement needs ease.
10. Sleeve Length
Measure from shoulder tip → elbow → wrist.
Bend the arm slightly for natural movement allowance.
11. Dress Length
Measure from shoulder to the desired hemline (knee, midi, maxi).
Write down length according to the dress style you want.
12. Thigh & Knee Round (optional)
Helpful for fitted silhouettes or body-con dresses.
Step-by-Step Guide: How to Make a Dress Pattern at Home
Follow these simple steps to create your first dress pattern at home:
Step 1: Take Accurate Body Measurements
Measure bust, waist, hips, shoulder width, armhole depth, and desired length. Write everything down.
Step 2: Sketch Your Design on Paper
Roughly draw how you want your dress to look — neckline, sleeves, and overall shape.
Step 3: Draft the Basic Bodice Block
Use your measurements to create the front and back bodice on pattern paper. Mark darts, armholes, and neckline.
Step 4: Add Seam Allowances
Leave at least 1 cm around all edges for sewing. Don’t forget the hemline!
Step 5: Cut the Pattern Pieces
Carefully cut along the pattern lines using a pair of scissors. Label each piece: front, back, sleeve, etc.
Conclusion
Make dress pattern at home is not just a skill, it’s the kind of creative freedom that gives you full control over your personal style.
Once you understand how to measure correctly, draft the pieces, and follow each step with care, you’ll realize that creating a perfectly fitted dress at home is easier and more rewarding than it seems.
Whether you’re a fashion beginner, a home designer, or a professional tailor sharpening your craft, pattern-making empowers you to design outfits that truly reflect your personality,
your body shape, and your imagination.
Every project you complete builds more confidence and sharpens your design eye.
And the best part?
With the right tools, a little patience, and clear guidance, you can turn any idea into a wearable, custom-fitted outfit, made by you.
![]() If you want to speed up your journey, explore these ready-to-use dress pattern kits on Amazon, perfect for learning faster and creating professional-quality designs at home.
If you want to speed up your journey, explore these ready-to-use dress pattern kits on Amazon, perfect for learning faster and creating professional-quality designs at home.
Dressmaking isn’t just stitching… it’s self-expression, skill, and satisfaction, all woven together.